Wednesday

Freelancing & Invoicing

   Well, I promised a post about Avaleigh but instead I have something else for you today. NEWS.

   Freelancing has been going well for me, slow but I do get a couple jobs here and there. Today I was asked for an invoice. Panic ensued; I've never had to invoice anyone before. So I set out to create an invoice of my own.

   First I had to create a logo. Of course this was my favorite part of the process. I have a colorful clare logo, yes, but I felt for invoicing I really needed something more professional.


TA DA the rebranding of me.

   WHY THE BEE, you ask? Well for some reason growing up, my nickname was Clarebees. It was a nickname that my aunt gave to me for no particular reason, but it stuck. So anyway I decided to incorporate that into the logo :) I thought of the things I do that I might have to charge for in the future and created 3 separate logos for the different facets of myself. I might just use the plain logo or the 'graphics' logo but I thought it was cool to have different ones.

Thanks for caring <3 have a fantastic day everyone


kitty pics

Today I'm gettin' stuff done. My life's been so chaotic recently and it's starting to spiral out of control... I don't know what the cause of it was but I think the fact that my life is so spread all over the place and I spend half of my time in the car really has a lot to do with it. Either way I'm taking control back. Starting with sorting through some pics. :)


KITTY FEST KITTY FEST KITTY FEST


hopefully in the next couple of days we will be having a photo journal with the lovely little miss avaleigh..

PREVIEW:


Friday

avocado treat :D

Alright party people, here is the highly anticipated tutorial on BAKED AVOCADO w/ CHEESE & EGG. :D


YOU WILL NEED:
An avocado
Shredded Cheese
2 Eggs
A cookie sheet
Aluminum Foil
A spoon
A knife
Seasonings of your choice :)
An oven!


Preheat!! to 400 degrees.

Step 1 - Cut your avocado in half. Yummmm.

Step 2 - Scoop out the center of the avocado so that your egg has room. Just so you know, cut out more than you think you need. I had to rescoop mine after I poured the first egg in because I realized I didn't have enough room.

If you love seasoning, like I do, you can season the avocados now before you add the eggs.

Step 3! Prepare a cookie sheet with aluminum foil because you will spill egg. Crack yo' eggs in the center of the avocados.


Step 4 - now that your oven is preheated, put the eggs in! Gently :)

Step 5 - After about 15-20 minutes check your avocados. It all depends on your oven, of course, but the eggs should be lookin pretty cooked. Take them out if they look close to done.

Step 6 - Cheese, please. I used mexican but next time I would prefer a white cheese mix, such as mozzarella. Then put them back in the oven.

Step 7 - final seasonings. This is of course optional but as I said earlier, I love seasonings. I used salt, pepper, garlic salt & oregano.


Step 8 - Find a place to relax and enjoy your meal :) I chose the balcony. I could barely finish mine... This might be a dish better suited for two people! Quite delicious. I think the cheese is great but it would be good without it as well.


NEXT TIME:
kitty pics!!!


ttfn


a long awaited update


Well people, it's been a while. Many things could be said but I will give you the short and sweet version :)


I started school Monday at Kendall College of Art & Design. I've gone to college before but not in the past two years and I have missed it so, so terribly. I am loving being back in school and in such a creative environment!! I don't even mind the homework.

I have been taking lots of pictures (but not as many as I would like to) as usual, and experimenting with some new editing techniques. Here are a few of the shots I've taken this week.


I've got a little more free time on my hands as I'm going to be working a lot less, but hopefully that time will be filled with productive things like this kind of photo editing and homework. Hope you didn't forget about me in my absence, and let's hope I can stay motivated to keep this blog more updated :)


COMING SOON:

a tutorial on how to make the most delicious avocado treat you ever did experience. it's gonna be good, and healthy too so stay tuned!!


Monday

polyvore

ok, so i broke down...
beach adventures

comfy couture


beauty is different for everyone.
but the popular idea of beauty changes with every decade.
the truth is,
beauty is only skin deep.

so why do we put so much focus on it?

musing on the fact that i'm seriously creating outfits...wtf. haha.

sweet summertime

sweet summertime

sweet summertime by clare-mulderink on polyvore


Broke down & got a polyvore.... made this one with dddulcie

how to: mother's day crayon art


For mother's day this year I decided to try one of the crayon drip paintings I've seen all over the internet these days. It was a real trial & error process but I'm really happy with the end result. Since I had to figure out a few things about the process along the way, I figured I'd share them with you here.
SO to make your crayon art,

YOU WILL NEED:
 crayons,
a canvas board,
white school glue,
a hair dryer,
a tablecloth or newspaper.
an x-acto knife or scissors,
paint (optional)
(click the pictures for the big versions)

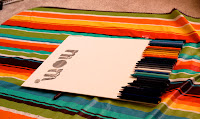
After deciding on the kind of colors and design that I wanted, I took off the wrappers of the crayons. This isn't necessary, it's really just about how you want the finished product to look. I wanted less crayon to show and more wax, so I used to x-acto knife to cut a slit down the length of the wrapper for easy removal (dulcie's idea, props). Then I used elmer's glue to glue the crayons on the board.

I put aluminum foil in the shape of the letters I wanted to be on the canvas later. I planned on removing the aluminum foil and hoping the canvas would show through, but it didn't work out as I planned. This was part of the experiment but I worked it out later.

A word of wisdom, do NOT use spray adhesive on these puppies. Just in case you were thinking about it. The stuff is the devil. Everything, and I mean EVERYTHING will stick to your hands, and also the adhesive does not hold up under heat. When I used it and started the blow dryer up, the crayons literally blew off the canvas. Boo hoo.


Next came the fun part, the blow drying. :D The crayons were so cool to watch as they melted. My strategy was to sit in one spot (preferably the spot that you want to show through pretty well) for an extended period of time. The colors don't run together nearly as much. I did this on the yellow and orange bit of the painting.


This project gets messy which is why I recommend a tablecloth.
 

I melted the my painting one way but I didn't like the sharp edges of the crayons on top, so I flipped it and blow dried it upside-down.


 As I was saying, the aluminum foil didn't really turn out. So I used white paint to cover it up. After the paint dried I outlined the letters with a sharpie. :)


VOILA!
The finished product.
:)

Check out my friend dulcie's crayon art!